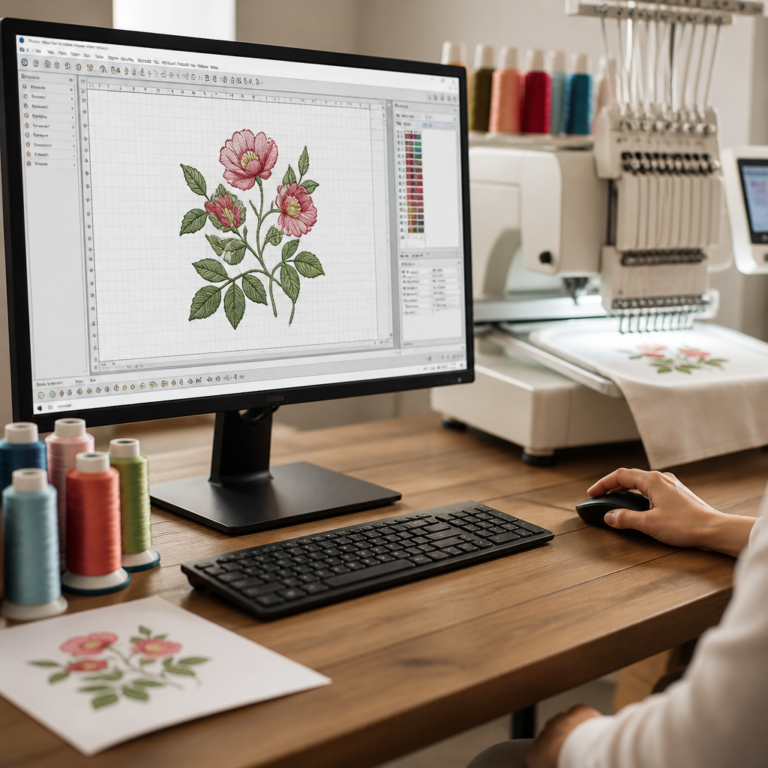
Embroidery digitizing software converts artwork into machine-readable stitch data, bridging the gap between design intent and production reality. For apparel decorators, this matters because a logo that looks clean on screen can sew poorly without proper stitch types, density, pull compensation, and sequencing. In practical terms, digitizing is the process of translating shapes, lines, and fills into commands an embroidery machine can run accurately on a specific garment, stabilizer, and thread setup. Good embroidery digitizing software helps shops control quality, shorten sew-out revisions, standardize repeat orders, and price jobs with fewer surprises. It also connects directly to broader apparel shop operations: quoting, proof approvals, job tickets, production scheduling, and reorders. I have seen small shops lose margin not because the design was complex, but because artwork was accepted without understanding what it would take to digitize and sew cleanly on caps, fleece, or performance polos. A solid workflow starts before the first stitch is assigned. This guide explains what embroidery digitizing software does, which features matter, how the digitizing process works, where errors usually happen, and how apparel shop management software supports the entire order lifecycle around digitized files.
What embroidery digitizing software actually does
Embroidery digitizing software is not the same as graphic design software. Adobe Illustrator or CorelDRAW can create vector art, but they do not define underlay, stitch angle, entry and exit points, trims, tie-ins, or machine sequencing the way digitizing software does. A digitizing platform lets an operator assign satin stitches to narrow columns, fill stitches to larger areas, run stitches to detail lines, and compensation settings to account for fabric movement and thread spread. It then exports machine file formats such as DST, PES, EXP, JEF, VP3, or XXX, depending on the brand of equipment in the shop.
The best digitizing tools also include simulation, density mapping, lettering controls, applique support, auto-digitizing assistance, and editing functions for existing embroidery files. Editing matters more than many buyers expect. In a real production environment, shops often receive an old DST from a client but need to resize it, improve push-pull handling, swap sequence order, or convert a left-chest design into a cap-friendly version. Software that only creates files from scratch but cannot inspect and refine stitch objects limits efficiency fast.
For an apparel decorator, the software decision should be tied to the jobs the shop runs most. A business focused on polos, uniforms, and left-chest corporate logos needs strong lettering, clean satin borders, and repeatability. A shop producing fashion embroidery, patches, or mixed applique and puff embroidery needs more advanced control over specialty techniques. The point is simple: embroidery digitizing software is production software, not just creative software.
Core features that separate basic tools from production-ready platforms
When I evaluate embroidery digitizing software for a shop, I look first at manual control. Auto-digitizing can save time on simple art, but it rarely produces production-ready files on its own. Shops need object-based editing, stitch-by-stitch inspection, density adjustment, pull compensation, underlay selection, pathing control, and lettering libraries with properly digitized fonts. Without those, operators spend more time troubleshooting thread breaks, gaps, registration problems, and bulky overlaps on the machine.
File compatibility is another non-negotiable feature. Commercial embroidery shops often run mixed machine fleets or work with contract embroiderers using different brands. The software should import common embroidery formats, export the formats the shop actually needs, and preserve object data whenever possible. Good preview and realistic simulation also matter because they improve proofing and internal review before a sew-out.
Production-ready platforms usually add fabric-specific controls, hooping templates, sequin or chenille options where relevant, barcode support, and better lettering distortion handling on curved surfaces like caps. They also support cleaner resizing. That point deserves emphasis: resizing embroidery is not like resizing vector art. A small change may be safe, but significant scaling usually requires recalculating density, stitch length, and compensation. Software that manages this intelligently reduces costly re-digitizing.
| Feature | Why it matters in embroidery production | Typical use case |
|---|---|---|
| Object-based editing | Lets the digitizer change stitch properties without rebuilding the file | Adjusting satin width or fill angle on a customer logo revision |
| Lettering tools | Improves readability at small sizes and on difficult fabrics | Left-chest polos and uniform programs |
| Density and pull compensation controls | Prevents gaps, stiffness, and distorted shapes | Performance knits, fleece, and structured caps |
| Multi-format export | Supports different machine brands and contract partners | Sending files as DST for one client and PES for another |
| Simulation and stitch player | Catches sequencing issues before the sew-out | Reviewing trims, jumps, and color changes during prepress |
Professional support from industry experts

Aaron
Signage, Apparel & Print

Crystal
Apparel, Signage & Print

Jennifer
Signage

Craig
Signage

Hannah
Signage
How to turn artwork into stitches step by step
The digitizing process starts with artwork review, not software clicks. First, confirm the final use: cap front, jacket back, sleeve, patch, or left chest. Then confirm finished size, garment type, fabric behavior, backing, thread colors, and machine limitations. A 3.5-inch left-chest logo on pique polo requires different decisions than the same mark at 10 inches wide on a twill jacket back. If the art contains gradients, tiny outlines, distressed textures, or photographic detail, simplify it before digitizing. Embroidery rewards clarity, not visual complexity.
Next, clean the artwork and set the design boundaries. Convert text to embroidery lettering or redraw it if necessary. Assign stitch types by function: satins for borders and narrow columns, fills for larger shapes, runs for detail lines and travel. Add underlay based on fabric and top stitch needs. Edge-run underlay helps define borders, while zigzag or tatami underlay can stabilize broader fill areas. Then plan the sequence to reduce trims and avoid sewing over completed sections unnecessarily.
After sequencing, set compensation and density for the fabric. Knit polos may need different handling than structured twill caps. Then simulate, run a test sew-out, and evaluate actual output. This is where experienced digitizers save money. They check registration, coverage, thread breaks, push-pull distortion, puckering, and readability from normal viewing distance. Final files should be saved in native editable format and in the machine format used on the floor, with clear naming tied to the customer, size, placement, and revision.
Common digitizing mistakes and how shops prevent them
The most common mistake is accepting artwork that should have been redesigned for embroidery. Fine serif fonts, thin outlines, tiny knockouts, and gradients often create poor sew results. Another frequent problem is overreliance on auto-digitizing. Automatic tools can identify regions, but they do not understand production priorities the way an experienced operator does. They may generate too many trims, awkward stitch angles, excessive density, or poor pathing that adds machine time and hurts quality.
Resizing machine files is another trap. Many shops assume they can enlarge or shrink a DST file freely, then discover distorted lettering and uneven fills. Native object files are safer because they preserve editable properties. Shops also underestimate fabric impact. A logo that sews perfectly on a twill jacket may sink into fleece or ripple on a lightweight performance shirt if underlay and compensation are not adjusted.
Prevention comes from process discipline. Require art review before quoting, define minimum text sizes, document stitch counts by standard logo version, and keep sew-out notes attached to the order record. For repeat programs, maintain approved files by garment type rather than one “universal” file. That is especially important for caps, where center-out sequencing and push compensation differ from flat goods.
How digitizing fits into apparel shop management software
Embroidery digitizing software solves the stitch file, but apparel shops make money by managing the entire workflow around that file. That includes quote creation, approval tracking, artwork status, purchasing blanks, scheduling machines, and recording reorders accurately. In practice, this is where shop management software becomes essential. A shop may digitize a logo perfectly and still lose profit if the proof sits unapproved, the sew file is attached to the wrong job, or production cannot see garment placement notes.
For apparel decorators managing embroidery alongside screen printing, heat press, or promotional items, centralized job tracking is even more important. ShopVOX is built for that operational layer. It supports quoting, job tracking, scheduling, and production visibility across product-decorating workflows, while CPortal helps with customer-facing proofing, approvals, and order status. That matters because digitizing is rarely a standalone event. It triggers artwork review, customer communication, possible revision rounds, and then a production handoff that must be documented clearly.
A strong workflow connects the digitized file to the estimate, approved proof, thread color notes, placement dimensions, sew-out approval status, and reorder history. For shops comparing apparel shop software, that connection is often the difference between smooth repeat business and tribal knowledge stuck with one production manager. Digitizing quality drives stitch results; workflow quality drives profit.
Choosing the right system for a growing embroidery shop
The right setup depends on volume, complexity, and staffing. A startup embroiderer may begin with entry-level digitizing tools plus disciplined file organization. A growing shop handling uniforms, contract work, and repeat client programs usually needs more advanced digitizing control and stronger shop management software at the same time. Evaluate software based on native editing strength, file format support, lettering quality, training curve, and how well it fits your actual order mix.
Also look beyond software demos. Ask how the shop will name files, store approved versions, track sew-out results, quote digitizing charges, and handle revisions across multiple placements. If embroidery jobs are part of a broader apparel decoration business, prioritize workflow visibility from estimate through production and reorder. That is where an all-in-one system earns its value.
Embroidery digitizing software turns artwork into stitches, but profitable embroidery depends on more than conversion alone. Shops need accurate art review, production-aware digitizing, disciplined testing, and organized job management. If you want cleaner sew-outs, fewer revisions, and better repeat-order control, review your current digitizing process and the workflow around it. Then build a system that treats digitizing as part of the whole apparel production operation, not an isolated design task.
Frequently Asked Questions
What is embroidery digitizing software, and how is it different from regular graphic design software?
Embroidery digitizing software is a specialized tool used to convert artwork into stitch instructions that an embroidery machine can actually sew. Unlike standard graphic design programs, which focus on how a design looks visually on screen or in print, digitizing software is built around how thread behaves on fabric during production. That difference is critical. A clean vector logo in a design program may appear production-ready, but an embroidery machine cannot interpret a shape, gradient, or outline the same way a printer can. It needs explicit instructions for stitch type, stitch direction, density, underlay, entry and exit points, pull compensation, and sewing order.
In other words, digitizing software bridges the gap between design intent and physical execution. It allows the user to assign satin stitches to borders, fill stitches to larger areas, running stitches to details, and compensation settings based on fabric stretch and garment type. It also helps account for real-world production factors such as puckering, thread breaks, registration issues, and how stitches interact when layered. For apparel decorators, this means the software is not just a conversion tool—it is a production planning system. Good digitizing software helps turn artwork into efficient, machine-readable stitch data that sews cleanly, holds up over time, and matches the realities of the specific garment, stabilizer, and thread being used.
Can embroidery digitizing software automatically convert artwork into stitches accurately?
Most embroidery digitizing software includes some kind of auto-digitizing feature, but the short answer is that automatic conversion should be treated as a starting point, not a finished result. Auto-digitizing can save time by identifying shapes, assigning basic stitch types, and creating a rough stitch file from vector art or high-contrast images. For very simple designs, such as bold text or uncomplicated logos with clearly separated color areas, it may produce a usable foundation. However, embroidery is a physical process, and software cannot always make the same judgment calls an experienced digitizer would make about fabric behavior, stitch flow, small detail handling, and sequencing.
The main limitation of automatic conversion is that it often focuses on the artwork’s appearance rather than the best way to sew it. A machine-ready file requires more than tracing outlines. It needs smart decisions about where to use satin versus fill stitches, how dense to make different areas, how to angle stitches for texture and coverage, how to reduce trims and jumps, and how to compensate for distortion on stretch fabrics or unstable materials. Without those adjustments, a design may look acceptable in software preview mode but sew with gaps, bulk, misalignment, or loss of detail. That is why experienced decorators typically use auto-digitizing to speed up setup, then manually refine the file. The best results come from combining software automation with production knowledge and test sewouts.
What settings matter most when turning artwork into embroidery stitches?
Several settings have a major impact on whether a design sews well, and understanding them is one of the keys to successful digitizing. Among the most important are stitch type, stitch density, stitch direction, underlay, pull compensation, and sequencing. Stitch type determines how different elements are built. Satin stitches are commonly used for borders, columns, and lettering; fill stitches are used for larger areas; and running stitches work for fine outlines and details. Choosing the wrong stitch type can make a design bulky, unstable, or visually unclear.
Density controls how closely stitches are packed together. Too much density can create thread buildup, stiffness, needle breaks, and puckering, while too little can leave fabric showing through. Stitch direction influences not only the look of the design but also how light reflects off the thread and how well shapes hold their edges. Underlay provides a foundation that stabilizes the top stitches and improves coverage, especially on textured or stretchy garments. Pull compensation is essential because stitches tend to pull inward as they sew; without compensation, columns, borders, and text can end up narrower than intended. Sequencing matters because the order in which elements sew affects registration, efficiency, and final appearance. A well-sequenced design reduces unnecessary trims and travel, helps control distortion, and supports cleaner production. Together, these settings determine whether a design simply exists as stitch data or functions as a reliable embroidery file in real production conditions.
Why does a design that looks good on screen sometimes sew poorly on a garment?
This happens because embroidery is not just a visual medium—it is a mechanical and material-driven process. On screen, artwork appears flat, precise, and unaffected by tension, texture, stretch, or thread thickness. On a garment, every stitch interacts with fabric grain, hooping tension, stabilizer support, needle penetration, and thread pull. A logo may appear perfectly balanced in digital form, yet once stitched onto a polo, cap, jacket, or performance fabric, the material may shift, the stitches may compress, and small details may close up or disappear. The screen preview cannot fully replicate those physical variables.
Poor sew quality often comes down to digitizing decisions that did not account for production reality. Common causes include excessive density, insufficient underlay, weak pull compensation, bad stitch angles, incorrect sequencing, or trying to preserve details that are too small for embroidery to reproduce cleanly. Garment choice matters too. A design that sews well on a structured twill cap may behave very differently on a stretchy knit shirt. Stabilizer selection and thread type also influence the outcome. That is why test sewouts are such an important part of the process. They reveal how the file performs on the actual substrate and give the digitizer a chance to refine the design before full production. In embroidery, success is measured not by how the artwork looks in software alone, but by how consistently and cleanly it runs on the intended item.
How do you choose the right embroidery digitizing software for apparel decoration work?
The right software depends on your production volume, skill level, design complexity, and the types of garments you decorate most often. At a minimum, good embroidery digitizing software should give you strong manual control over stitch creation rather than relying only on automatic conversion. Look for features that allow you to assign and edit stitch types, adjust density and underlay, apply pull compensation, control stitch angles, optimize sequencing, and simulate sew paths clearly. File format compatibility is also essential, since your software must export machine-readable formats that match your equipment. If you work with multiple machine brands, broad format support becomes even more important.
For apparel decorators, usability and production efficiency matter just as much as raw feature count. Software should make it practical to edit lettering, resize designs intelligently, create clean pathing, and test how a file will perform before it reaches the machine. If you regularly decorate difficult substrates like caps, performance wear, fleece, or bags, look for tools that support those use cases with specialized settings or workflows. Training resources, technical support, and community adoption are also worth weighing, especially if your team is still building digitizing expertise. The best software is not necessarily the most expensive one—it is the one that helps you consistently produce clean sewouts, reduce errors, and make informed adjustments based on garment, stabilizer, and thread. In a production environment, reliable control and repeatable results are what matter most.